
TODO : Il semble que cela soit valable pour davantage d’onduleurs ?

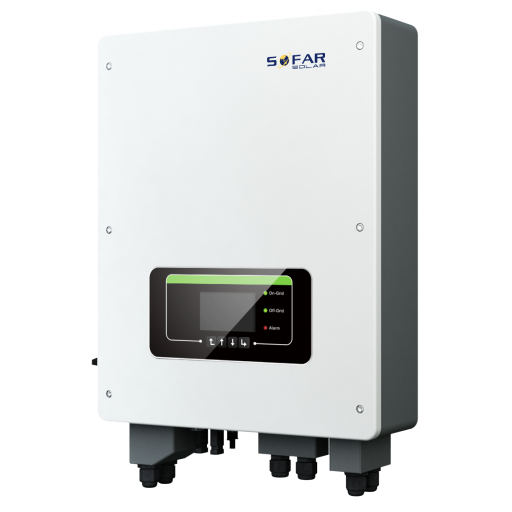
Onduleurs Sofar des séries TL-G3 et TLM/X-G3
Appareils pris en charge
| Device Type | Modbus TCP (Ethernet) | RS485 | Curtailment |
|---|---|---|---|
| ... | ✅ | ✅ | ✅ |
| 1100-3300TL-G3 | |||
| 3000-7500TLM | |||
| 10000-40000TL | |||
| 5000-80000TLX-G3 | |||
| 100000-125000TLX-G4 | |||
| 7000-10500TLM-G3 |
Avertissement
Avertissement
- La plupart des appareils peuvent communiquer via Modbus TCP. Cela ne s’applique pas à la série « SOFAR 1...40KTL »
- Certains onduleurs nécessitent un firmware spécifique, limité à certains distributeurs. En cas de doute, consultez votre distributeur.
Câblage
Ethernet
Connectez l’onduleur à votre réseau Internet à l’aide du « SOFAR SOLAR ETHERNET STICK LSE3 ».
Pour un câblage Ethernet correct : suivez les directives de câblage Ethernet.
RS485
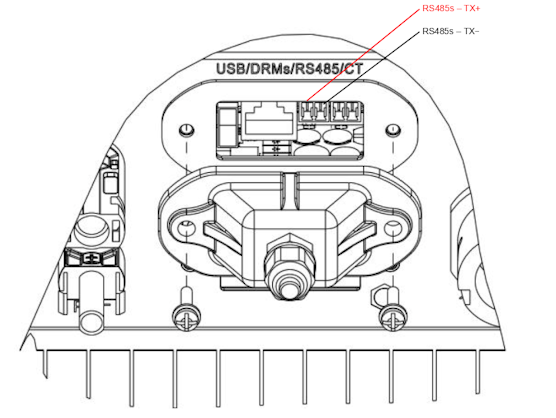
...TL-G3 & G1 & G2
Info
RS485 Wiring
- For correct RS485 wiring: Follow the guidelines for RS485 wiring.
- If the wiring shown in the table below is incorrect, please let us know.
- There is no general consensus in the industry about the usage of A and B for the RS485 polarity, so it may be counterintuitive and opposite of what you might expect for some devices.
| Device | SmartgridOne Controller model OM1 | SmartgridOne Controller model IG8 | RS485-USB converter | RS485-Ethernet converter |
|---|---|---|---|---|
| RS485s TR+ | RS485 A | RS485_POS | RS485 A | TX+ |
| RS485s TR- | RS485 B | RS485_NEG | RS485 B | TX- |
| N/A | RS GND | GND | Not available | G |
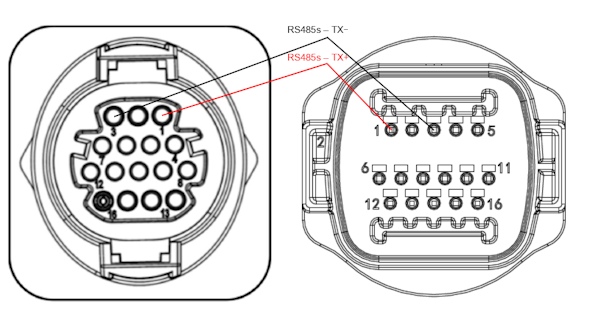
...TLX & TLM
Info
RS485 Wiring
- For correct RS485 wiring: Follow the guidelines for RS485 wiring.
- If the wiring shown in the table below is incorrect, please let us know.
- There is no general consensus in the industry about the usage of A and B for the RS485 polarity, so it may be counterintuitive and opposite of what you might expect for some devices.
| Device | SmartgridOne Controller model OM1 | SmartgridOne Controller model IG8 | RS485-USB converter | RS485-Ethernet converter |
|---|---|---|---|---|
| RS485s TR+ (pin 1) | RS485 A | RS485_POS | RS485 A | TX+ |
| RS485s TR- (pin 3) | RS485 B | RS485_NEG | RS485 B | TX- |
| N/A | RS GND | GND | Not available | G |
Configuration
RS485
Avertissement
NOTE: RS485 Device Addresses
- You MUST give each device on the RS485 bus a unique address. Check the manual of the device on how to do this.
- Use lower addresses first (1, 2, ...) because the SmartgridOne Controller will find them faster!
- For each device, it is generally recommended to stick with the factory default baud rate, parity, and stop bits. The SmartgridOne Controller will scan on those first.
Le contrôle externe de l'onduleur doit être activé dans le menu de configuration de l'onduleur via l'écran LCD.
- Appuyez brièvement sur le bouton vers le bas.
- Vous verrez « 1. Enter settings » ; appuyez sur le bouton vers le bas pendant 2 secondes pour accéder aux paramètres.
- Parcourez les paramètres jusqu'à voir :
- Modbus Address ou
- Set ComProtocol
- Appuyez sur le bouton vers le bas pendant 2 secondes pour définir l'adresse.
- Définissez l'adresse sur la valeur souhaitée.
Last updated August 17, 2026Edit this page