DEYE
Unterstützte Geräte
| Device Type | Variants | Modbus TCP (Ethernet) | RS485 | Curtailment |
|---|---|---|---|---|
| SG04LP3-EU | SUN-5/6/8/10/12K | ❌ | ✅ | ❌ |
| SG01LP1-EU | SUN-12/14/16K |
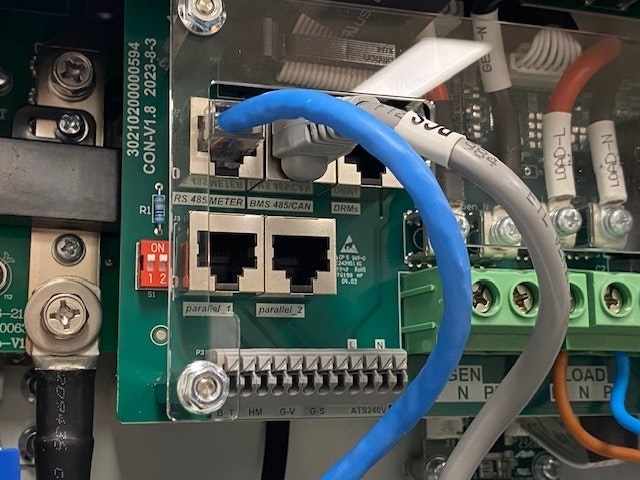
Verkabelung
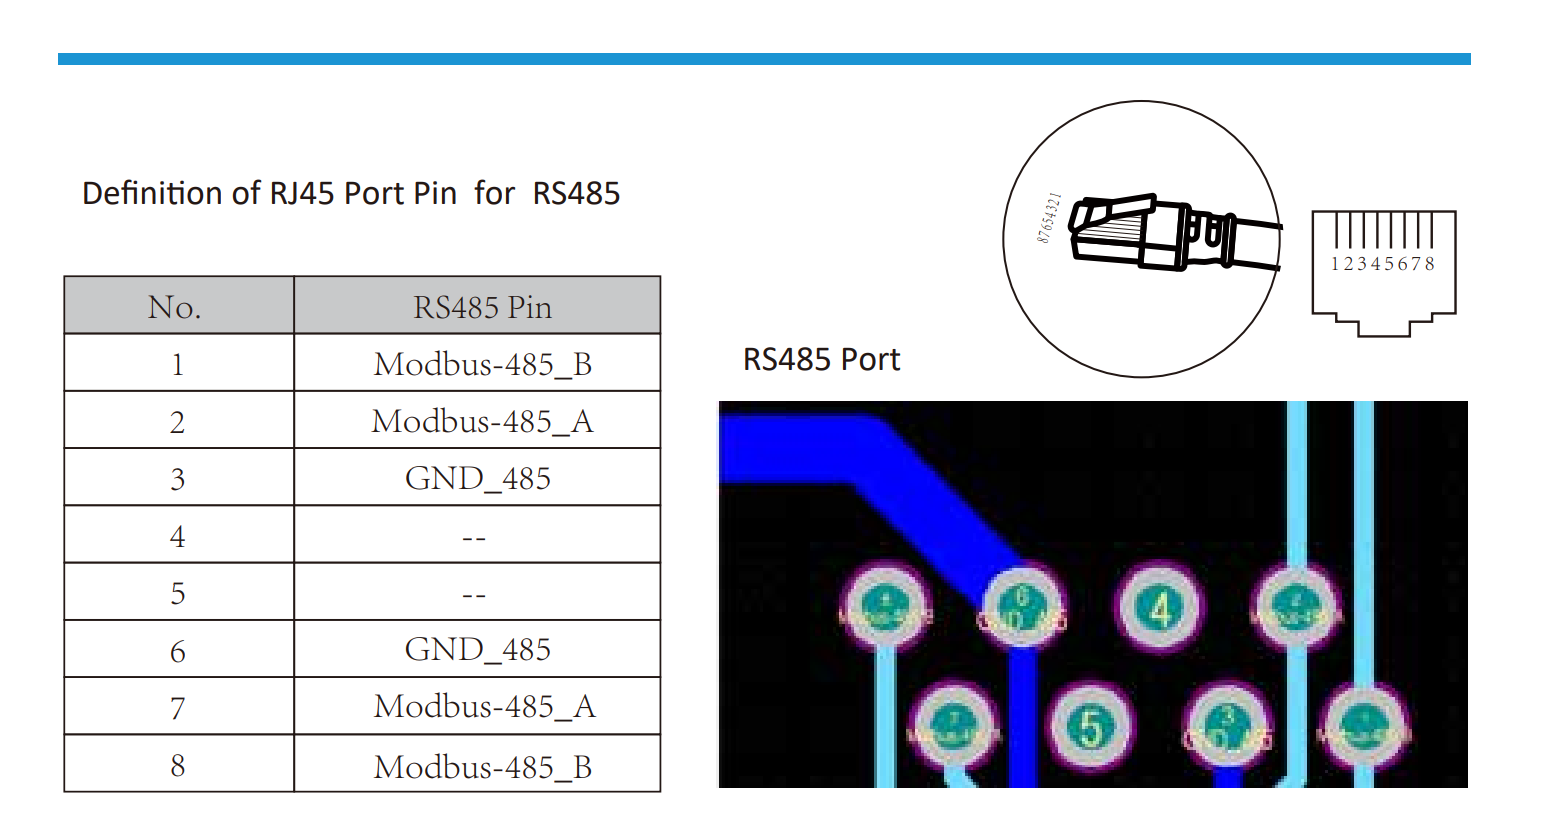
RS485
RS485 Wiring
- For correct RS485 wiring: Follow the guidelines for RS485 wiring.
- If the wiring shown in the table below is incorrect, please let us know.
- There is no general consensus in the industry about the usage of A and B for the RS485 polarity, so it may be counterintuitive and opposite of what you might expect for some devices.
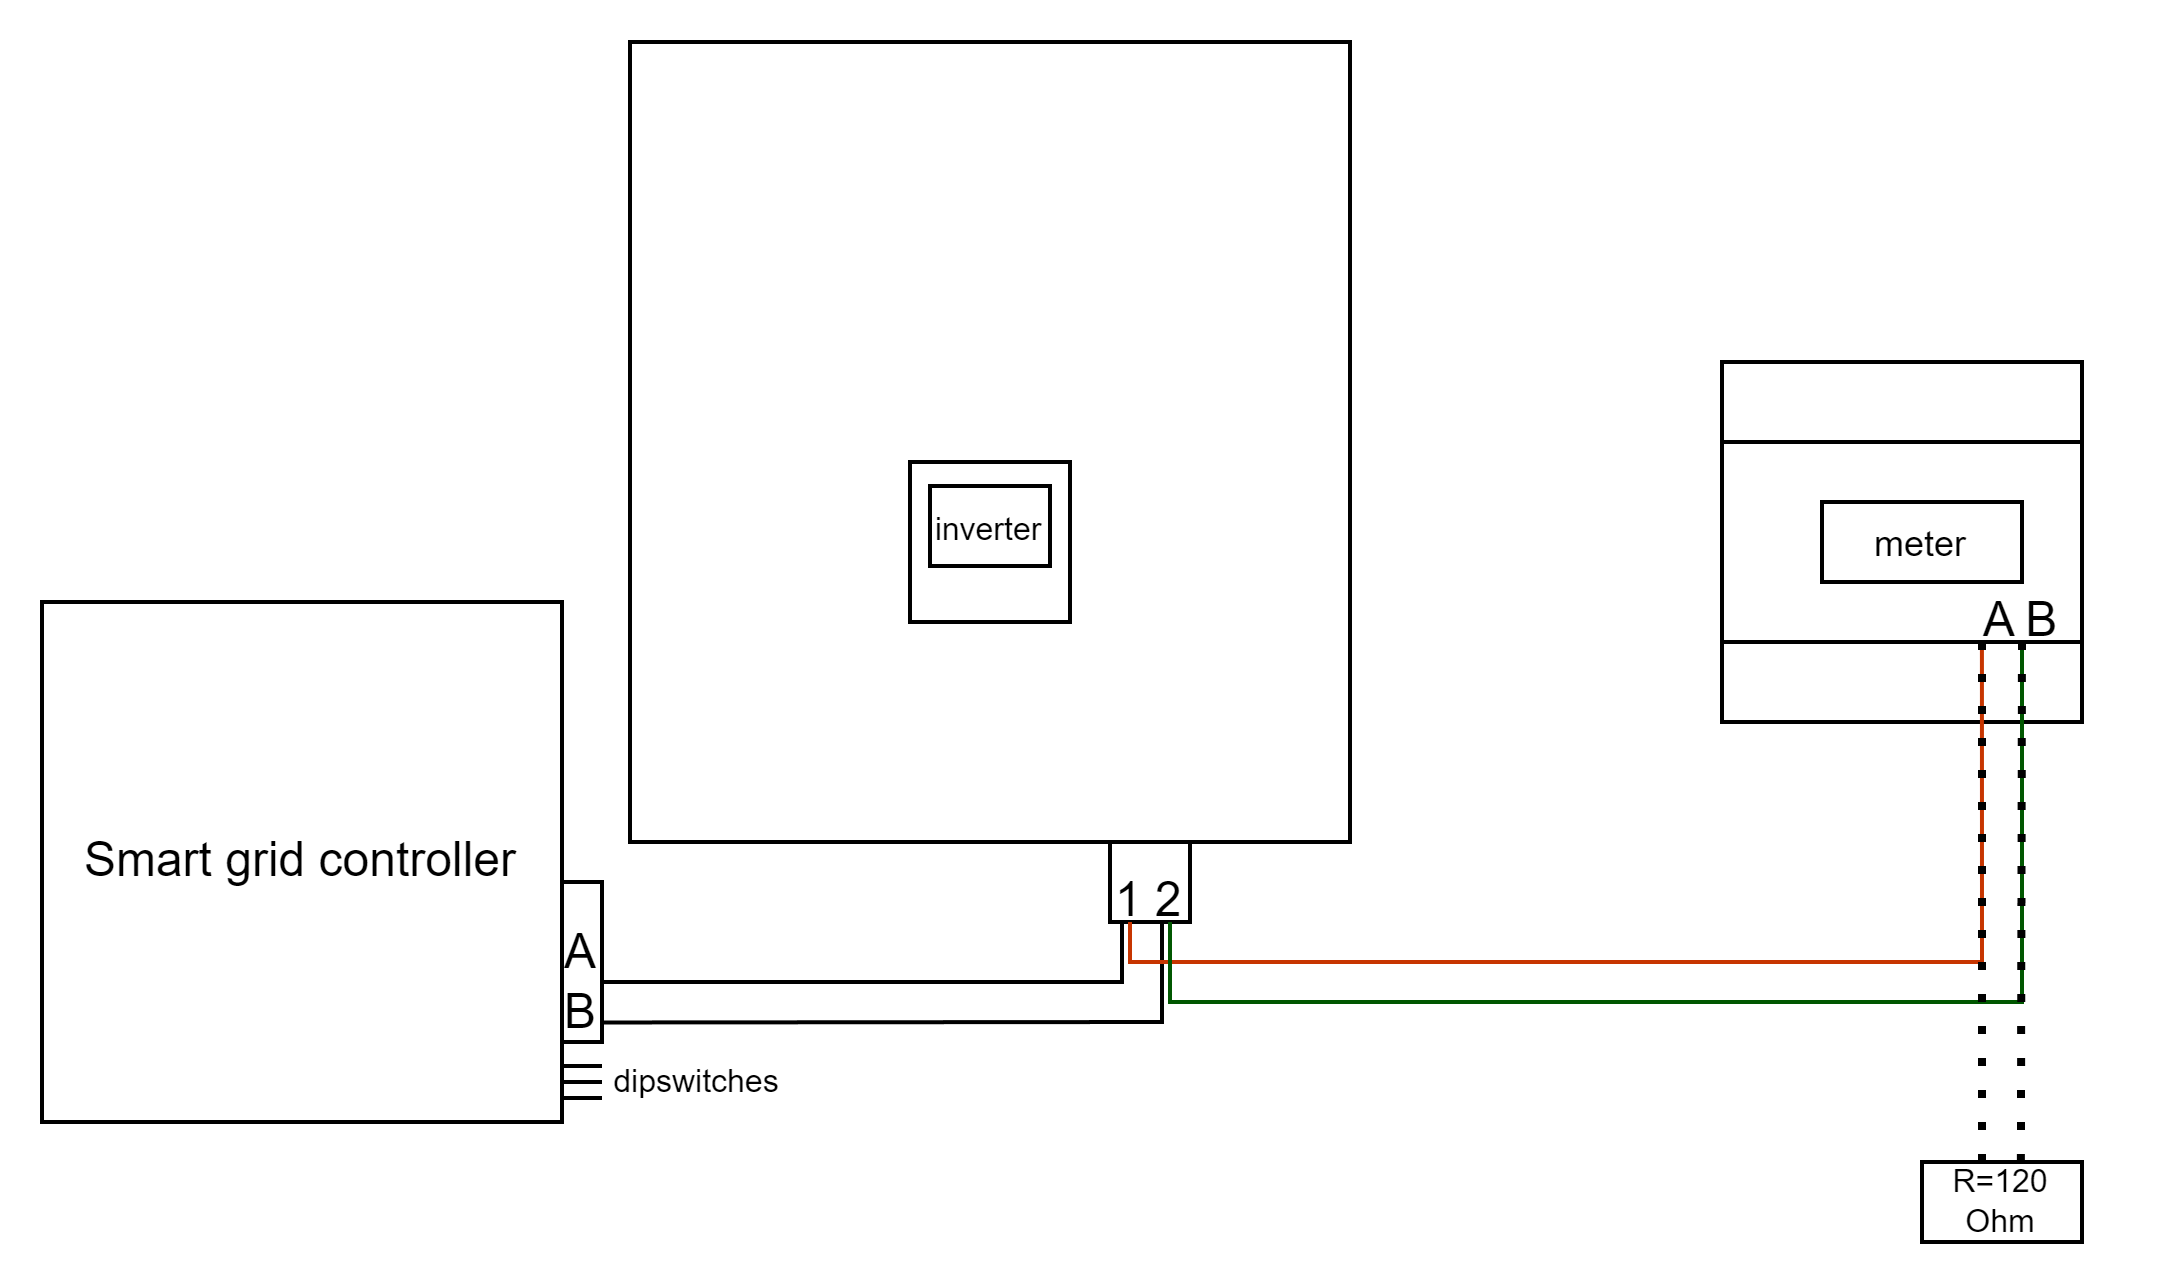
| Device | SmartgridOne Controller model OM1 | SmartgridOne Controller model IG8 | RS485-USB converter | RS485-Ethernet converter |
|---|---|---|---|---|
| Pin 1 / Modbus-485_B | RS485 A | RS485_POS | RS485 A | TX+ |
| Pin 2 / Modbus-485_A | RS485 B | RS485_NEG | RS485 B | TX- |
| Pin 3 / GND_485 | RS GND | GND | Not available | G |
Konfiguration
NOTE: RS485 Device Addresses
- You MUST give each device on the RS485 bus a unique address. Check the manual of the device on how to do this.
- Use lower addresses first (1, 2, ...) because the SmartgridOne Controller will find them faster!
- For each device, it is generally recommended to stick with the factory default baud rate, parity, and stop bits. The SmartgridOne Controller will scan on those first.
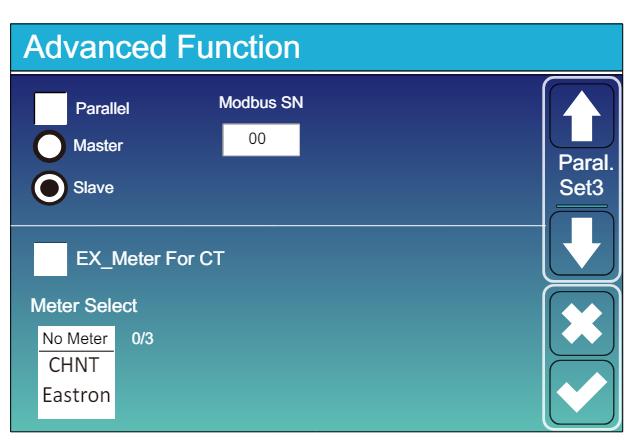
Gehe zu „Hauptbildschirm“ >> „Systemeinstellungen“ >> „Erweiterte Funktion.“
- Modbus SN sollte auf eine beliebige Zahl zwischen 1 und 247 eingestellt werden. Wähle nicht 0!! Beachte, dass, wenn mehrere Geräte am RS485-Bus angeschlossen sind, jedem eine eindeutige Nummer zugewiesen werden sollte. Dies ist die Adresse.
- Slave sollte aktiviert sein.
- Nur wenn ein zusätzliches Zählergerät direkt mit dem Wechselrichter verbunden ist, sollte „EX_meter Für CT“ aktiviert werden. Wenn nur ein Zähler parallel mit dem SmartgridOne Controller vorhanden ist, sollte es deaktiviert sein.
- Stelle sicher, dass die folgenden Einstellungen alle korrekt sind: "Max A Lade", "Max A Entlade", "Netzlade-Ampere"