Autarco MH-Serie RS485 Verkabelung

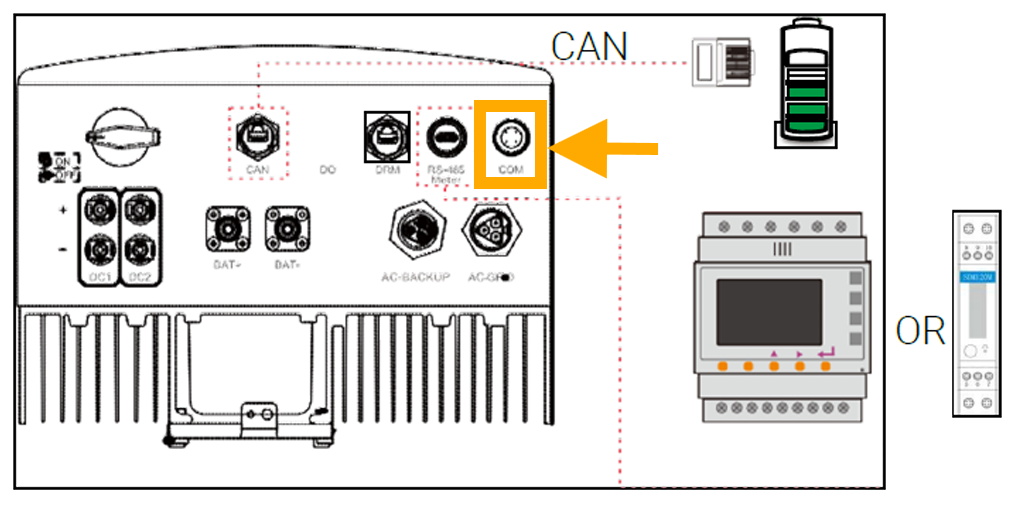
Diese Seite beschreibt die Kommunikation mit einem Autarco LH-Serie Hybridwechselrichter über Modbus-RTU (rs485). Standardmäßig ist der Wechselrichter auf die Adresse 1 eingestellt. Die RS485-Schnittstelle ist ein 4-poliger Anschluss, der "COM" genannt wird und sich an der Unterseite des Wechselrichters hinter einer Schutzplatte befindet. Die genaue Position ist im orangefarbenen Feld im Bild unten markiert:

Bei näherer Betrachtung sieht der Anschluss so aus:

Ein geeigneter Stecker sollte für diesen 4-poligen Anschluss am Autarco-Wechselrichter verwendet werden, um eine Verbindung zum SmartgridOne Controller herzustellen. Am SmartgridOne Controller kann der Wechselrichter an den RS485-Anschluss angeschlossen werden. Die Verdrahtung ist wie folgt:
- For correct RS485 wiring: Follow the guidelines for RS485 wiring.
- If the wiring shown in the table below is incorrect, please let us know.
- There is no general consensus in the industry about the usage of A and B for the RS485 polarity, so it may be counterintuitive and opposite of what you might expect for some devices.
| Device | SmartgridOne Controller model OM1 | SmartgridOne Controller model IG8 | RS485-USB converter | RS485-Ethernet converter |
|---|---|---|---|---|
| Pin 3 | RS485 A | RS485_POS | RS485 A | TX+ |
| Pin 4 | RS485 B | RS485_NEG | RS485 B | TX- |
| N/A | RS GND | GND | Not available | G |
- You MUST give each device on the RS485 bus a unique address. Check the manual of the device on how to do this.
- Use lower addresses first (1, 2, ...) because the SmartgridOne Controller will find them faster!
- For each device, it is generally recommended to stick with the factory default baud rate, parity, and stop bits. The SmartgridOne Controller will scan on those first.